

Custom jobs
Need products relabelled, bundled or repacked at the FreightNI warehouse? Request a custom job, and follow its status as the warehouse gets it done.
Request a custom job
Section titled “Request a custom job”- Click Warehousing in the top menu, then Custom jobs.
- Click Add custom job.
- On the Request tab, search for and pick the SKU.
- Choose the Job type: Product relabelling, Master carton change, Product packing change, Bundling or Other.
- In Job Specifics, describe exactly what you need done.
- Under Files, upload any new labels or other files the warehouse needs.
- Click Submit.
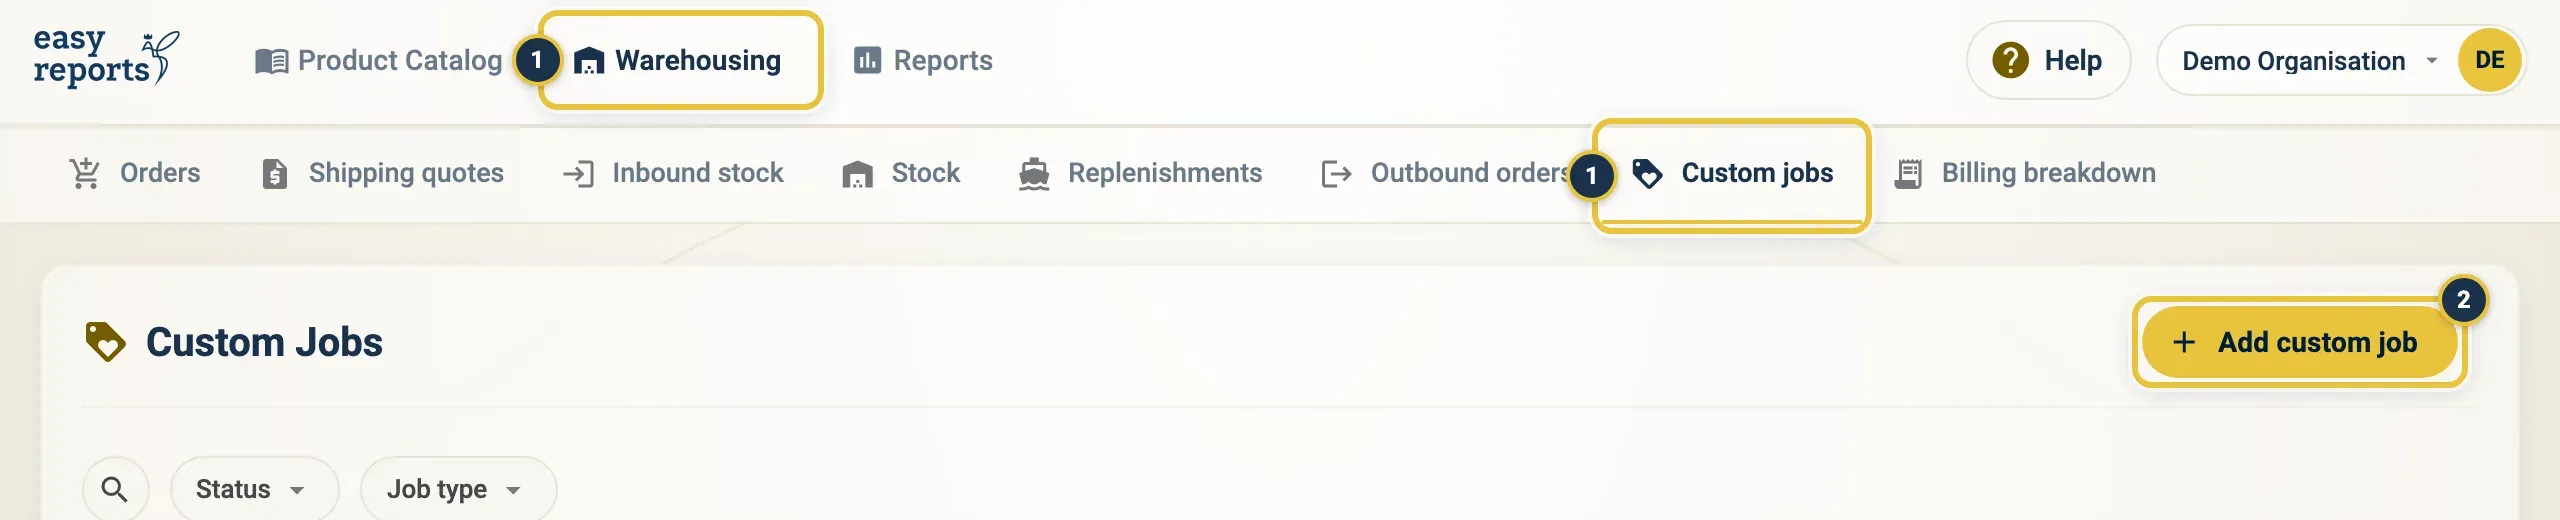
Warehousing, then Custom jobs (1), then Add custom job (2).
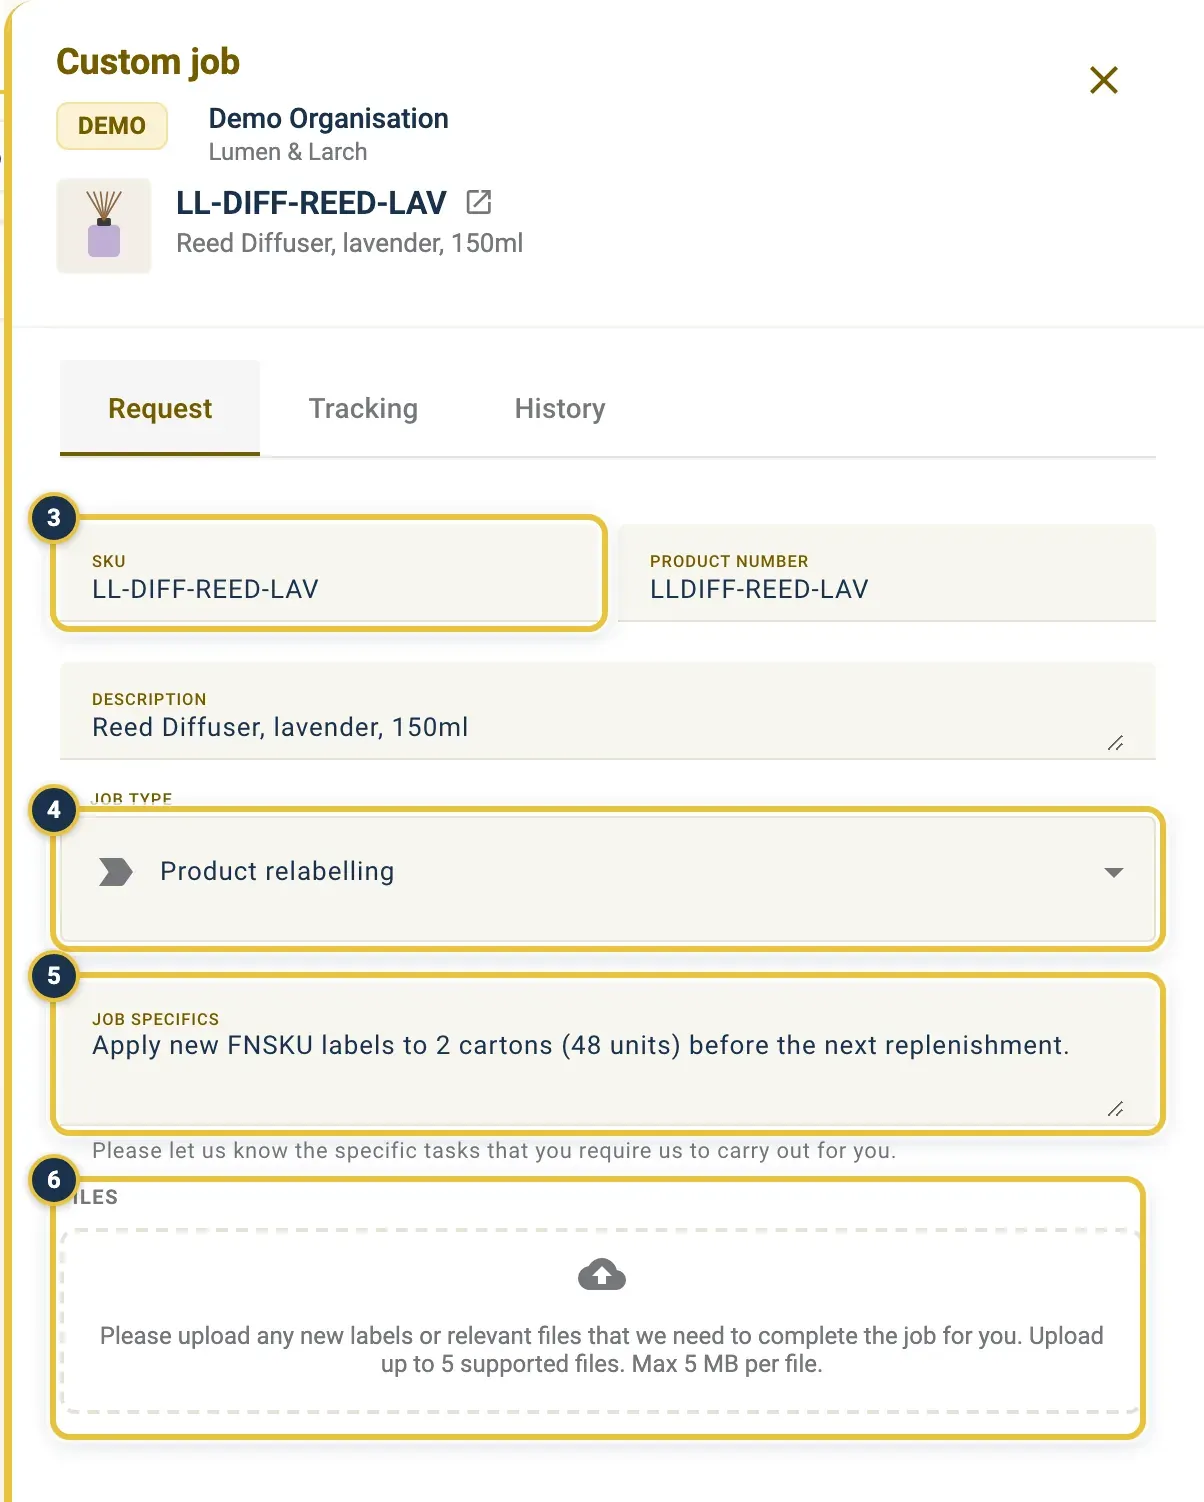
The SKU (3), Job type (4), Job Specifics (5) and Files (6). This is a request that was already submitted, so the fields are locked; a new one has a Submit button at the bottom.
Follow a custom job’s status
Section titled “Follow a custom job’s status”- On the Custom jobs page, find the job. Use the Status and Job type filters, or search.
- Read the Status column. A note icon shows a message from the warehouse team.
- Click the job to open it. The Tracking tab shows the status and dates, and the History tab shows every change.
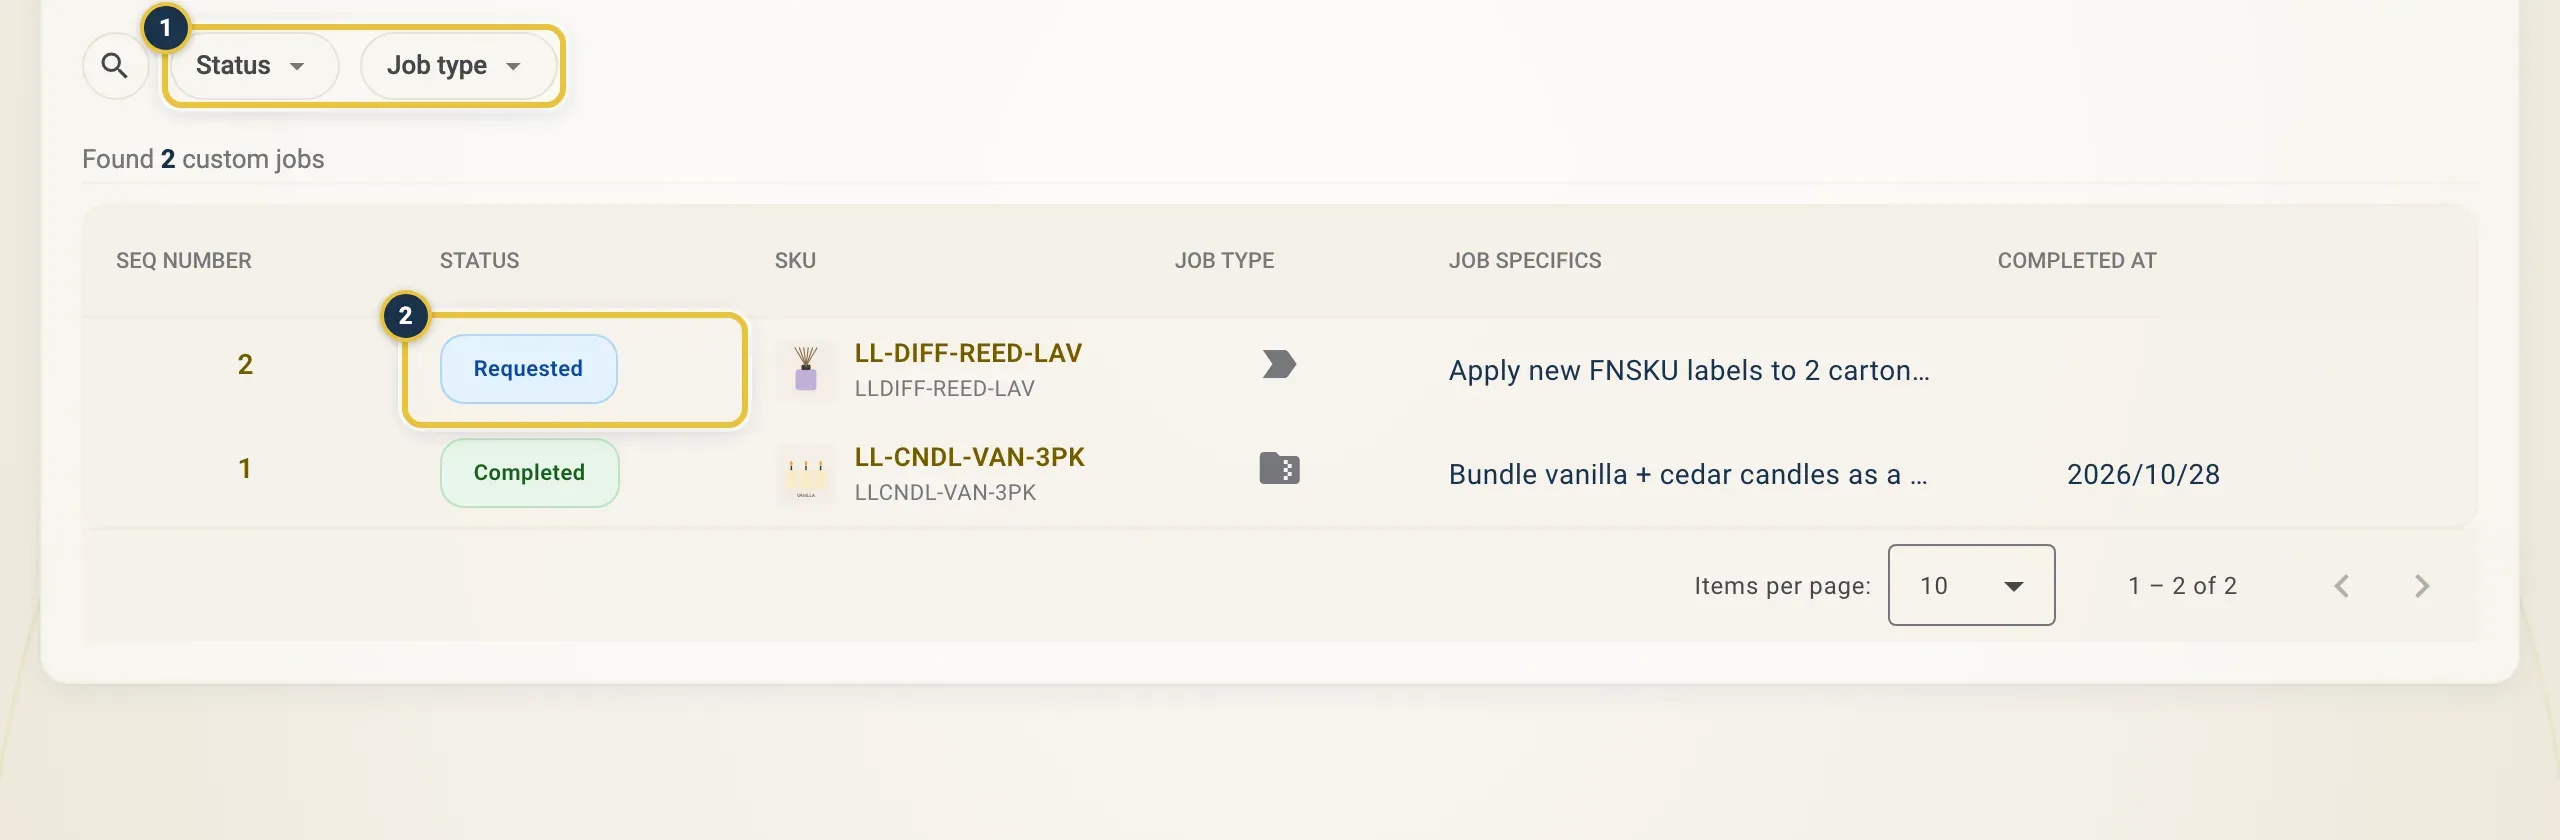
The Status and Job type filters (1) and the Status column (2).
A custom job moves through these statuses:
| Status | What it means |
|---|---|
| Requested | You have submitted the job. |
| Warehouse Notified | The warehouse has the job and is working on it. |
| Completed | The job is done. |
| Stuck | The job cannot go ahead yet. Check the message, or contact the warehouse team. |
Good to know
Section titled “Good to know”- You can upload up to 5 files per custom job, with a maximum of 5 MB per file.
- Once you submit a custom job, you cannot change it. Contact the warehouse team if something needs to change.
- For jobs on goods that have not arrived yet, you can also use Additional Jobs when you record Inbound stock.