

Outbound orders
Outbound orders release cartons from the FreightNI warehouse to any destination, such as a customer or another warehouse. To send stock into Amazon through the China Hub, use a replenishment instead.
Add an outbound order
Section titled “Add an outbound order”- Go to Warehousing > Outbound orders and click Add outbound order.
- Pick the product by its SKU. The Product Number and Description fill in by themselves.
- Choose the Dispatch type:
- Collection: you arrange the collection from FreightNI.
- Delivery: FreightNI arranges delivery. There is a charge for this service.
- Fill in Details for dispatch. For a collection, give the details of the person collecting the stock and any special requirements. For a delivery, give the address. The warehouse team then sends you a quote for the inland shipping cost within 24–48 hours.
- Enter the Number of cartons, and choose the Origin and Destination. Use the + button next to Destination to add a new address.
- If the cartons go to Amazon, upload the Amazon labels (one PDF for the product), and enter the Amazon shipment ID and Amazon Reference ID.
- Click Submit.
The cartons are reserved straight away, and FreightNI notifies the warehouse.
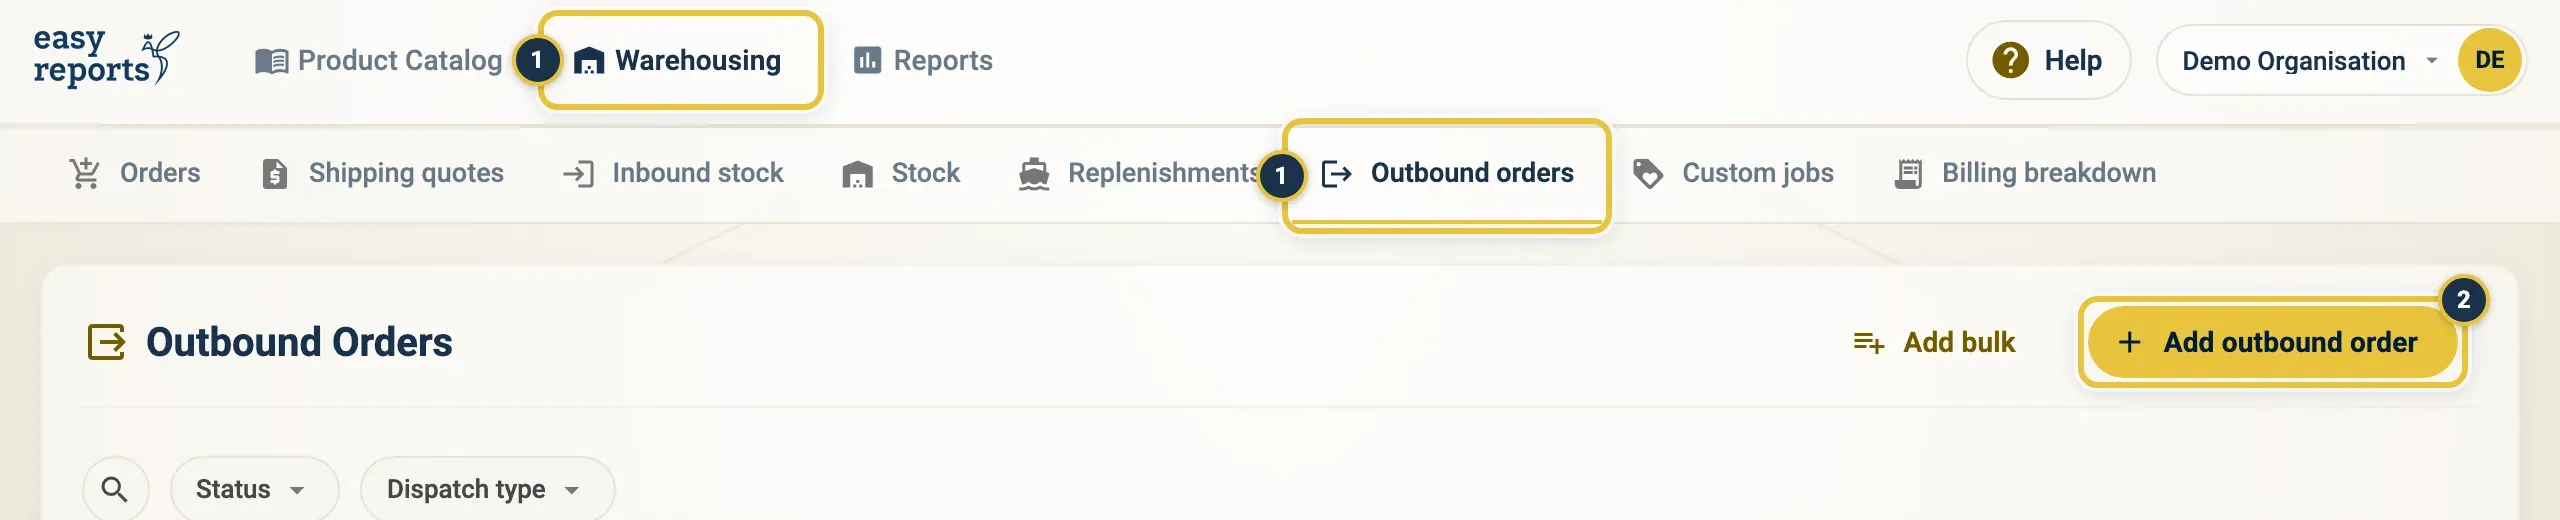
Warehousing, then Outbound orders (1), then Add outbound order (2). Add bulk is next to it.
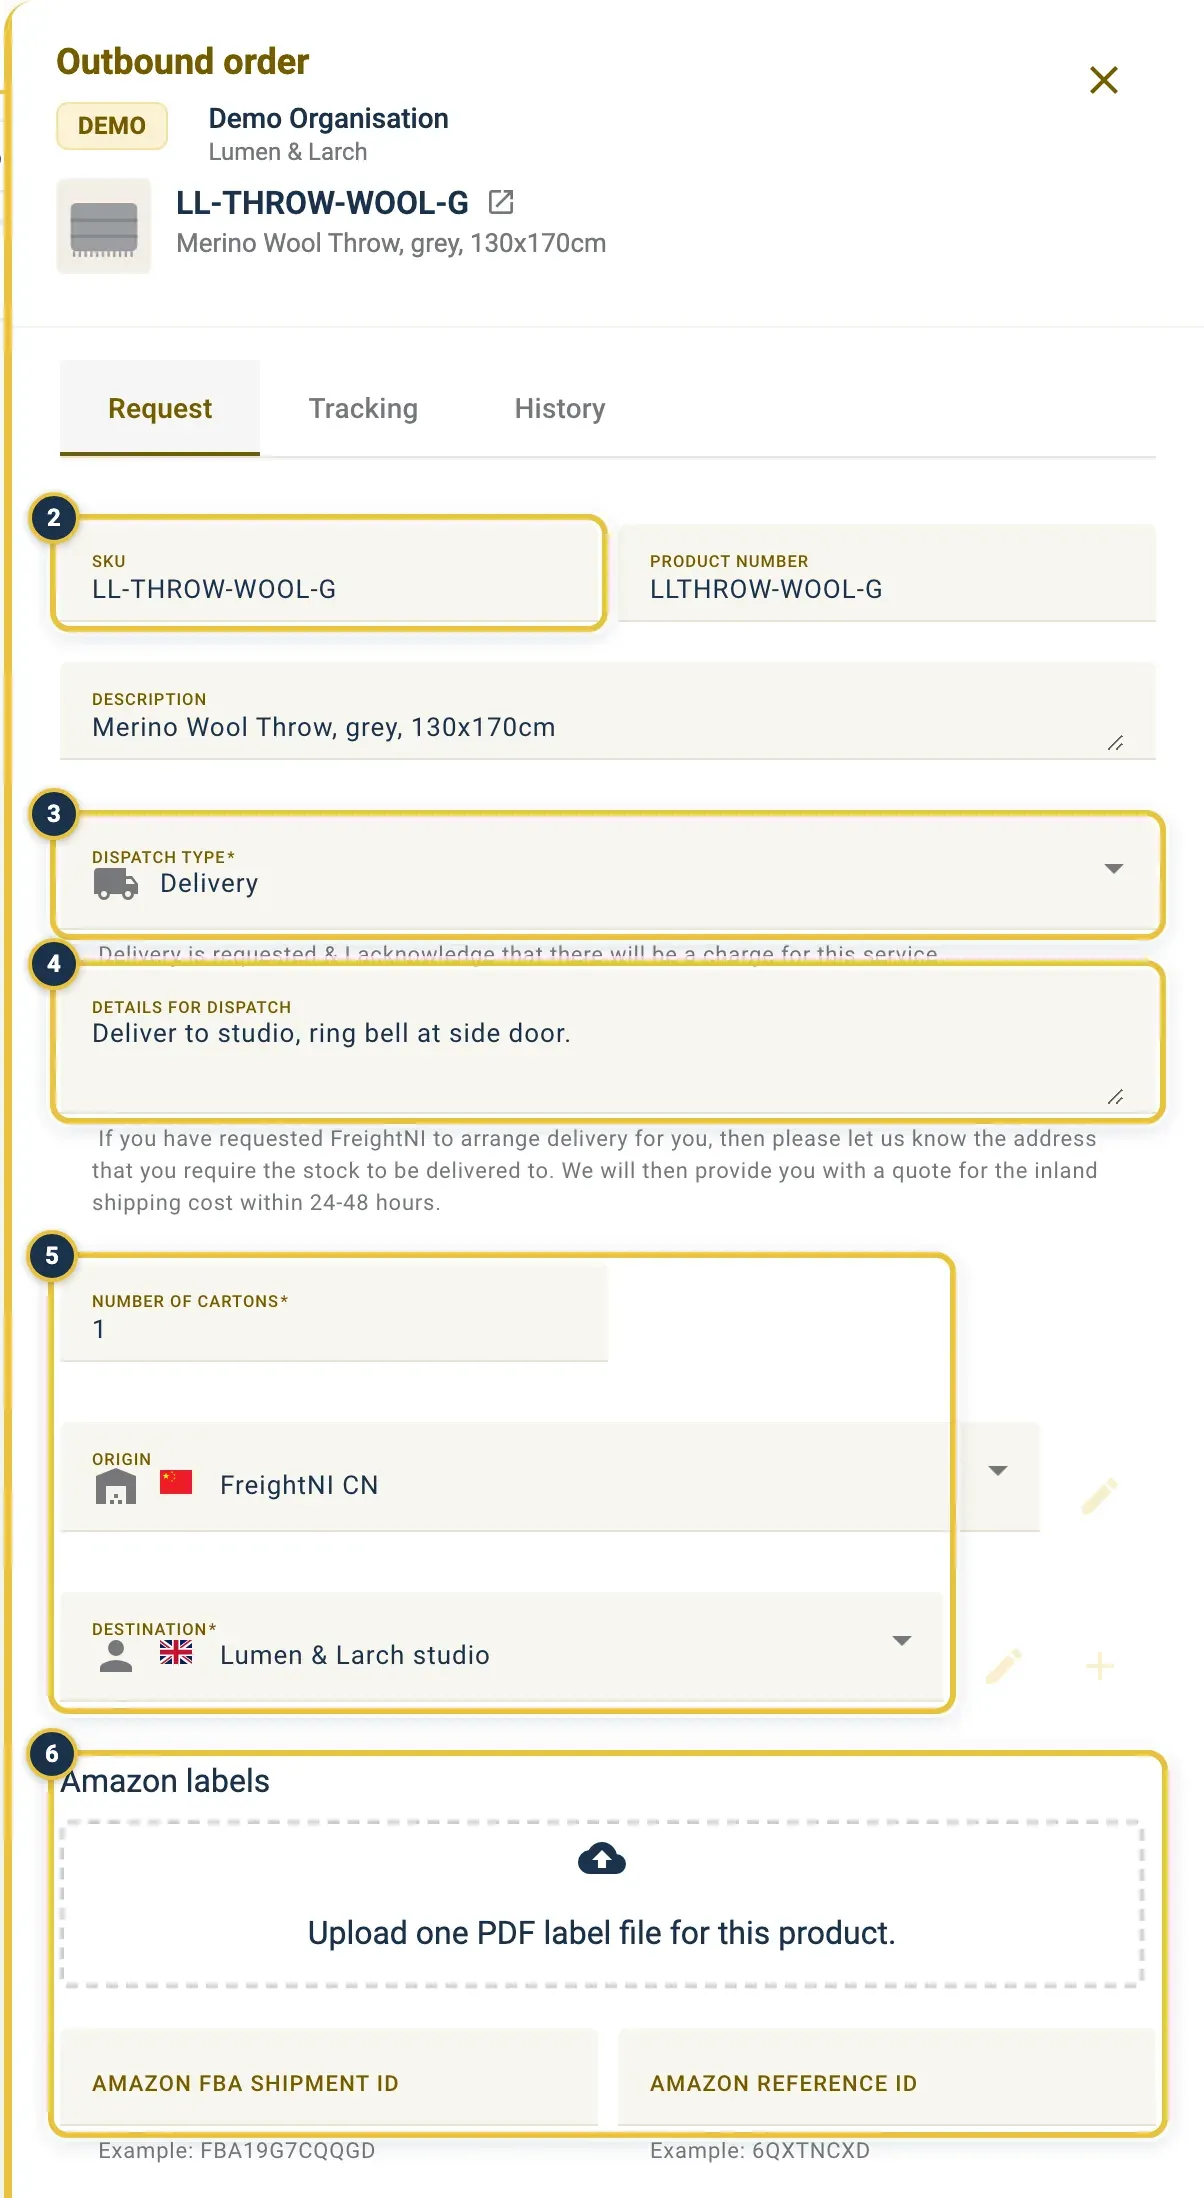
The SKU (2), Dispatch type (3), Details for dispatch (4), cartons, Origin and Destination (5), and the Amazon labels and IDs (6). This is a request that was already submitted, so the fields are locked; a new one has a Submit button at the bottom.
Open an outbound order to see its Request, Tracking and History tabs.
Add outbound orders in bulk
Section titled “Add outbound orders in bulk”Use Add bulk to create several outbound orders for the same shipment at once, one per product.
- On the Outbound orders page, click Add bulk.
- Fill in the dispatch details first: Dispatch type, Origin and Destination, and the Amazon shipment ID and Amazon Reference ID if the cartons go to Amazon.
- Under Products, click Add product for each product, choose it, and enter its Number of cartons.
- If needed, upload one PDF label file per product under Labels for SKU.
- Click Submit bulk.
Each product can only appear once in the bulk list, and you can’t ask for more cartons than are available (“Cannot exceed … available”).
Follow an outbound order
Section titled “Follow an outbound order”Open an outbound order and go to the Tracking tab to see its Status, Expected delivery date and Dispatched date. The list shows the progress as Requested → Warehouse notified → Handover.
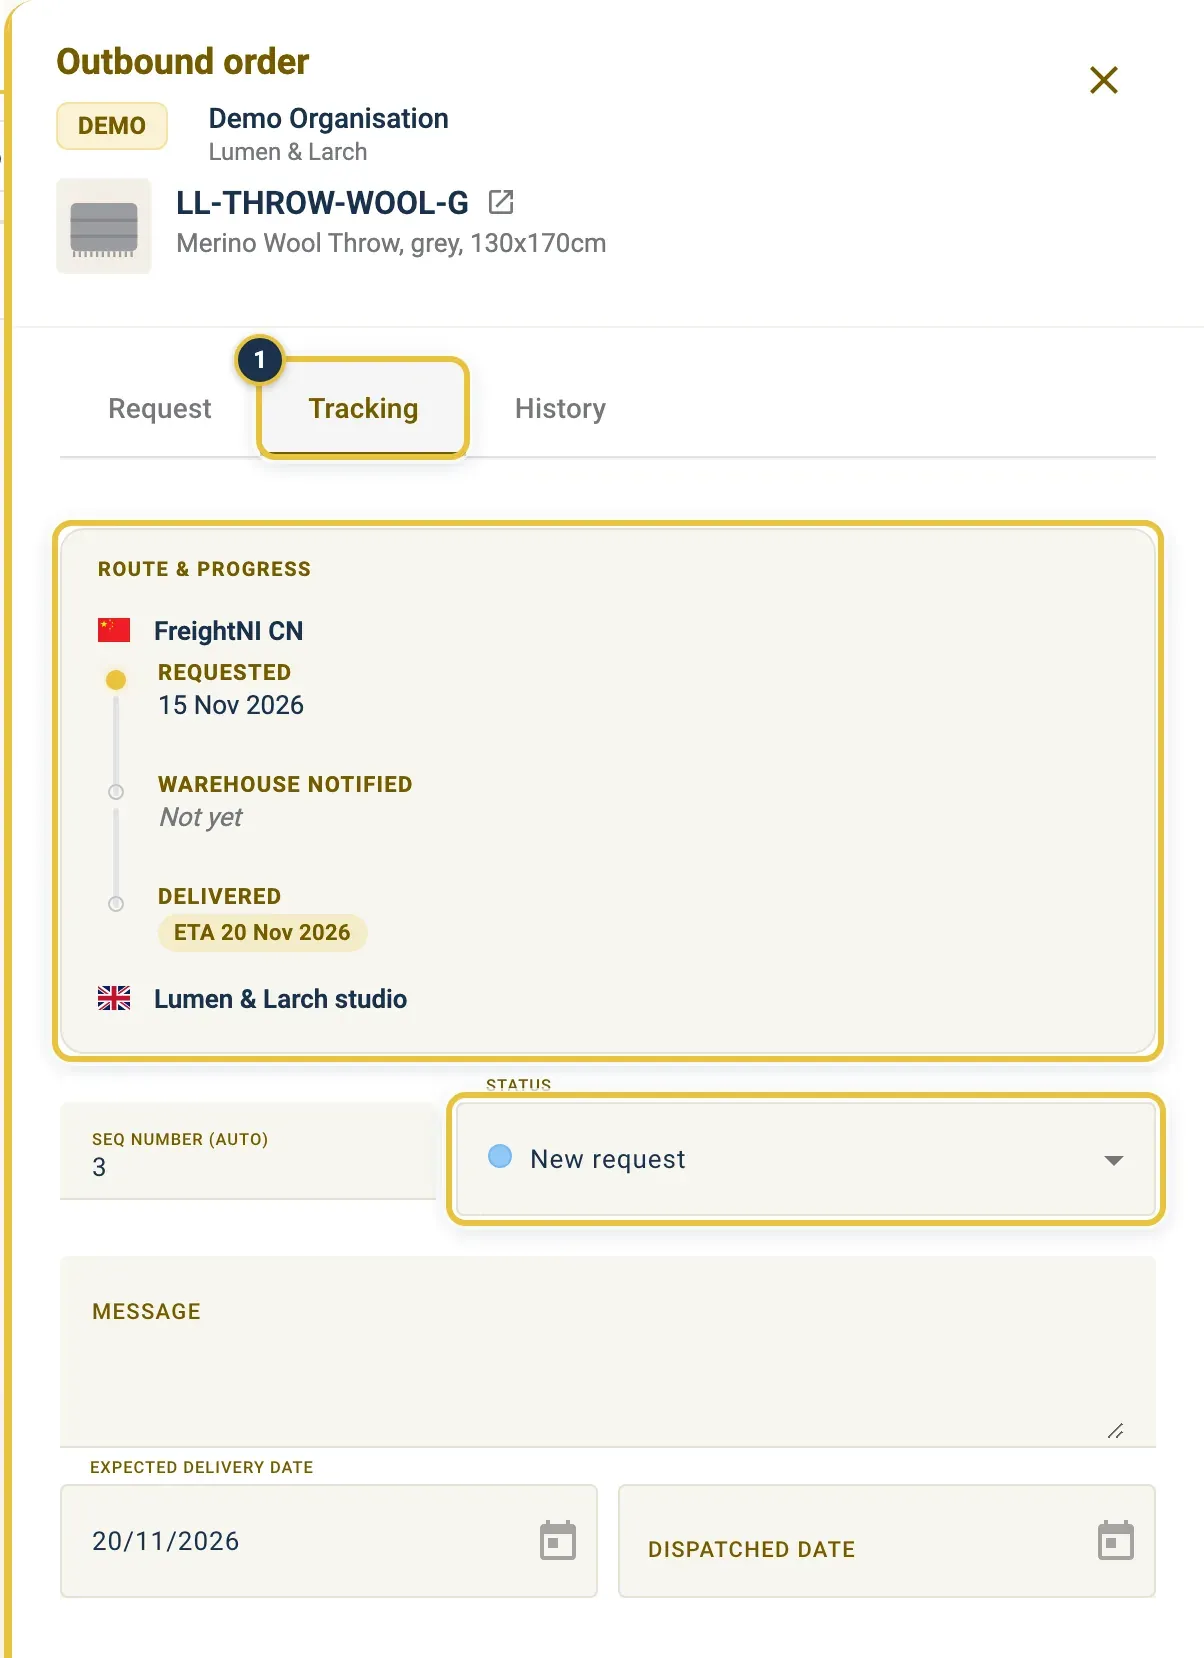
The Tracking tab (1) with the route and progress, the status and the dates.
| Status | What it means |
|---|---|
| New request | You submitted it. |
| Warehouse notified | FreightNI has passed it to the warehouse. |
| Outbound issue | Something needs sorting out. Hover over the info icon for the note. |
| Stock delivered | The cartons were delivered. |
| Stock collected | The cartons were collected. |
| Cancelled | The order was cancelled. |
| Rejected | The order was rejected. |
The History tab shows every change and who made it.
Download Amazon labels for an outbound order
Section titled “Download Amazon labels for an outbound order”- On the Outbound orders page, find the order.
- In the Amazon column, click the PDF icon (Download Amazon labels).
The icon only shows when labels were uploaded for that order.
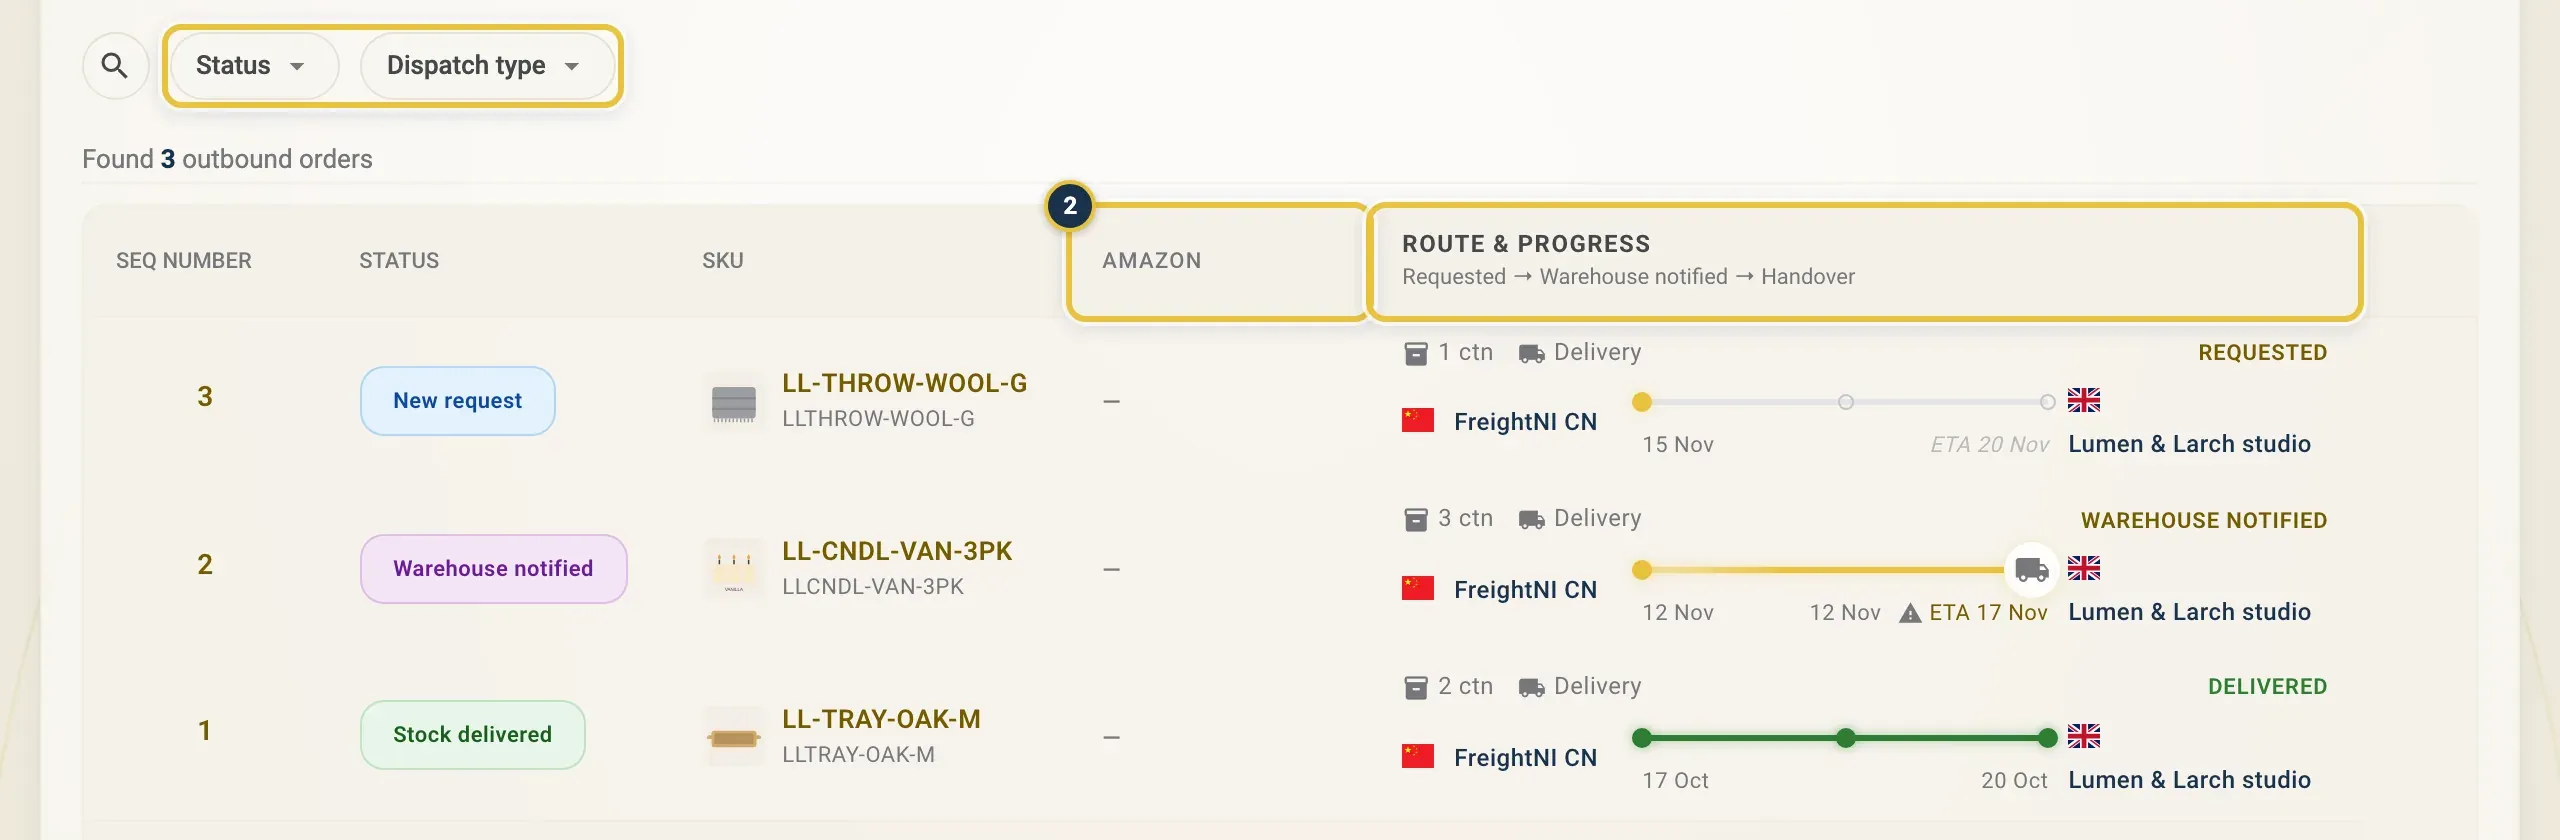
The Status and Dispatch type filters sit above the list; the Amazon column (2) holds the labels download.
Filter outbound orders
Section titled “Filter outbound orders”Use the Status and Dispatch type chips above the Outbound orders list, or type in the search box. Click Clear all to remove the filters.
Good to know
Section titled “Good to know”- After you submit, only the warehouse team can change or cancel an outbound order. Contact them if something needs to change.
- Check your available cartons on the Stock page before you start.