

Replenishment: automatic
With Amazon connected, on Lite and Pro, EasyReports creates the Amazon shipment for your replenishment. You don’t build it in Seller Central, and you don’t copy IDs back by hand.
Before you start, connect Amazon and make sure your products are in the Product Catalog.
Start an automatic replenishment
Section titled “Start an automatic replenishment”- Go to Warehousing > Replenishments and click Add replenishment.
- In Shipment details, choose the Shipping method (Sea Freight or Air Express) and the Destination (your Amazon fulfilment centre or AWD).
- Under Amazon shipment, choose Create new. Click Continue.
- In Products, add each product and its Number of cartons. One request can hold several products. Click Continue. EasyReports saves the request as a draft from here on.
- In FreightNI quote, check the FreightNI shipping cost for each product, and click Continue.
The Create new option only shows when Amazon is connected on Lite or Pro, and the destination is an Amazon warehouse.
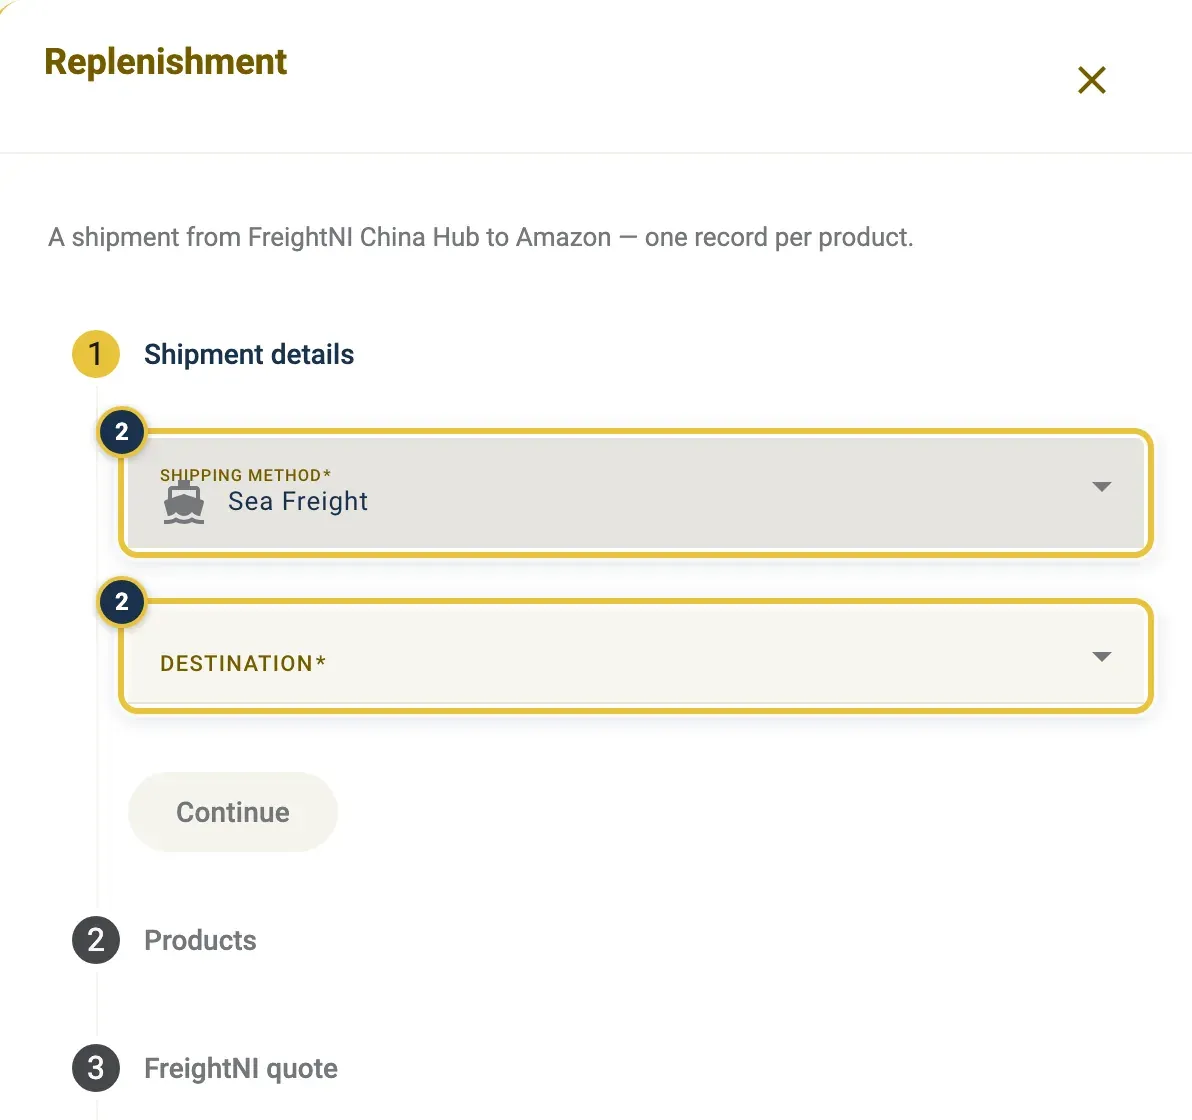
Shipment details: the Shipping method and the Destination (2). With Amazon connected, Amazon shipment with Create new shows below them.
Let Amazon create the shipment
Section titled “Let Amazon create the shipment”The fourth step of an automatic replenishment is Amazon creates the shipment.
- Click Check with Amazon. In about a minute, Amazon returns its options: how many shipments, where they go, and the Amazon fee. Nothing is booked by asking.
- Pick an option. A free option often splits your cartons across several Amazon warehouses, with one replenishment per shipment. For a few boxes, one destination is usually simplest.
- Click Create shipment. This takes about a minute.
- Amazon creates the shipment. The shipment ID, destination and labels come back by themselves. The reference ID follows shortly.
- Click Continue.
Changed your mind before you click Create shipment? Click Cancel quote, so the plan does not stay in your Seller Central.
Review and submit an automatic replenishment
Section titled “Review and submit an automatic replenishment”- In Review, check the route (FreightNI China Hub → your destination), the Amazon shipment and the costs.
- Click Submit.
Each product becomes its own replenishment, and the FreightNI invoice follows by email. Then follow each one as described in After you submit.
Send to AWD
Section titled “Send to AWD”Sending to Amazon Warehousing and Distribution (AWD) works the same way. Choose your AWD address as the Destination. AWD has no placement fee, and bills storage after it receives your cartons.
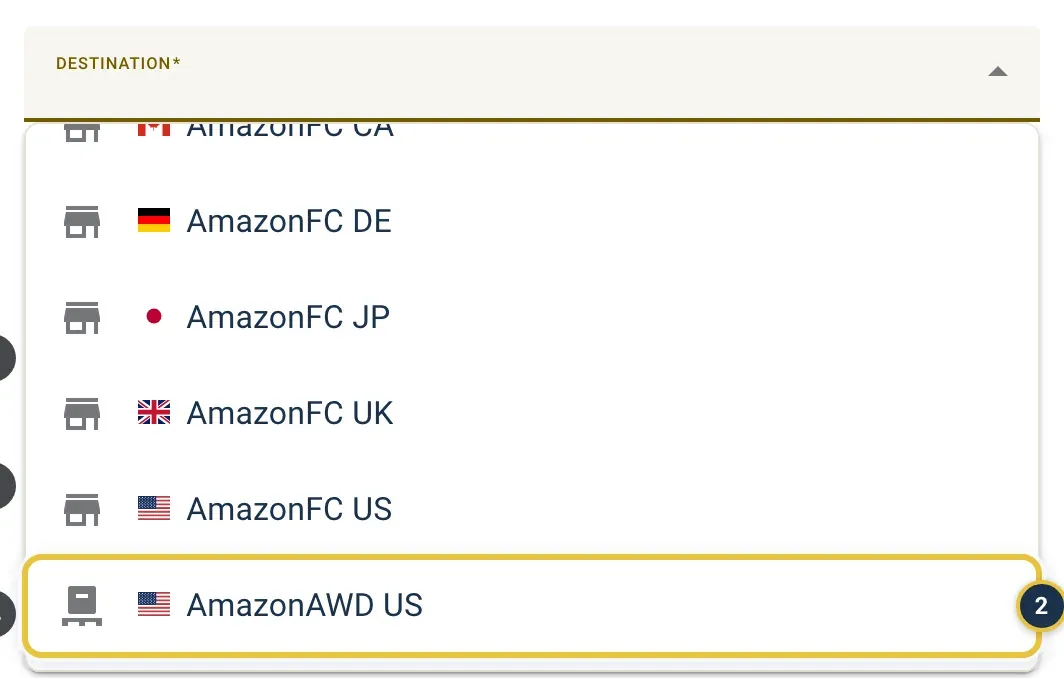
Pick your AWD address, for example AmazonAWD US, as the Destination (2).
Use a shipment you already created
Section titled “Use a shipment you already created”If you already created the shipment in Seller Central:
- Under Amazon shipment, choose Existing shipment.
- Enter the Amazon FBA shipment ID (for AWD: AWD STAR shipment ID).
- Click Auto Populate. EasyReports reads the products and cartons from Amazon.
The rest is the same as Replenishment: manual.
Good to know
Section titled “Good to know”- The Amazon placement fee is charged by Amazon to your own seller account. It is not FreightNI shipping.
- Once Amazon has created the shipment, the products and cartons in the request are locked.